The Site Group feature in SkyDeck enables you to organize your operations effectively by grouping different sites according to your needs. SkyDeck allows flexible grouping without restrictions on how you organize sites. You can assign these site groups to project milestones for enhanced project tracking and control user access to specific site groups.
This article covers the following features:
Creating a new Site within a Group
Add an existing Site to a Group
Unlinking Site from a Site Group
Understanding the Layout of the Site Group page
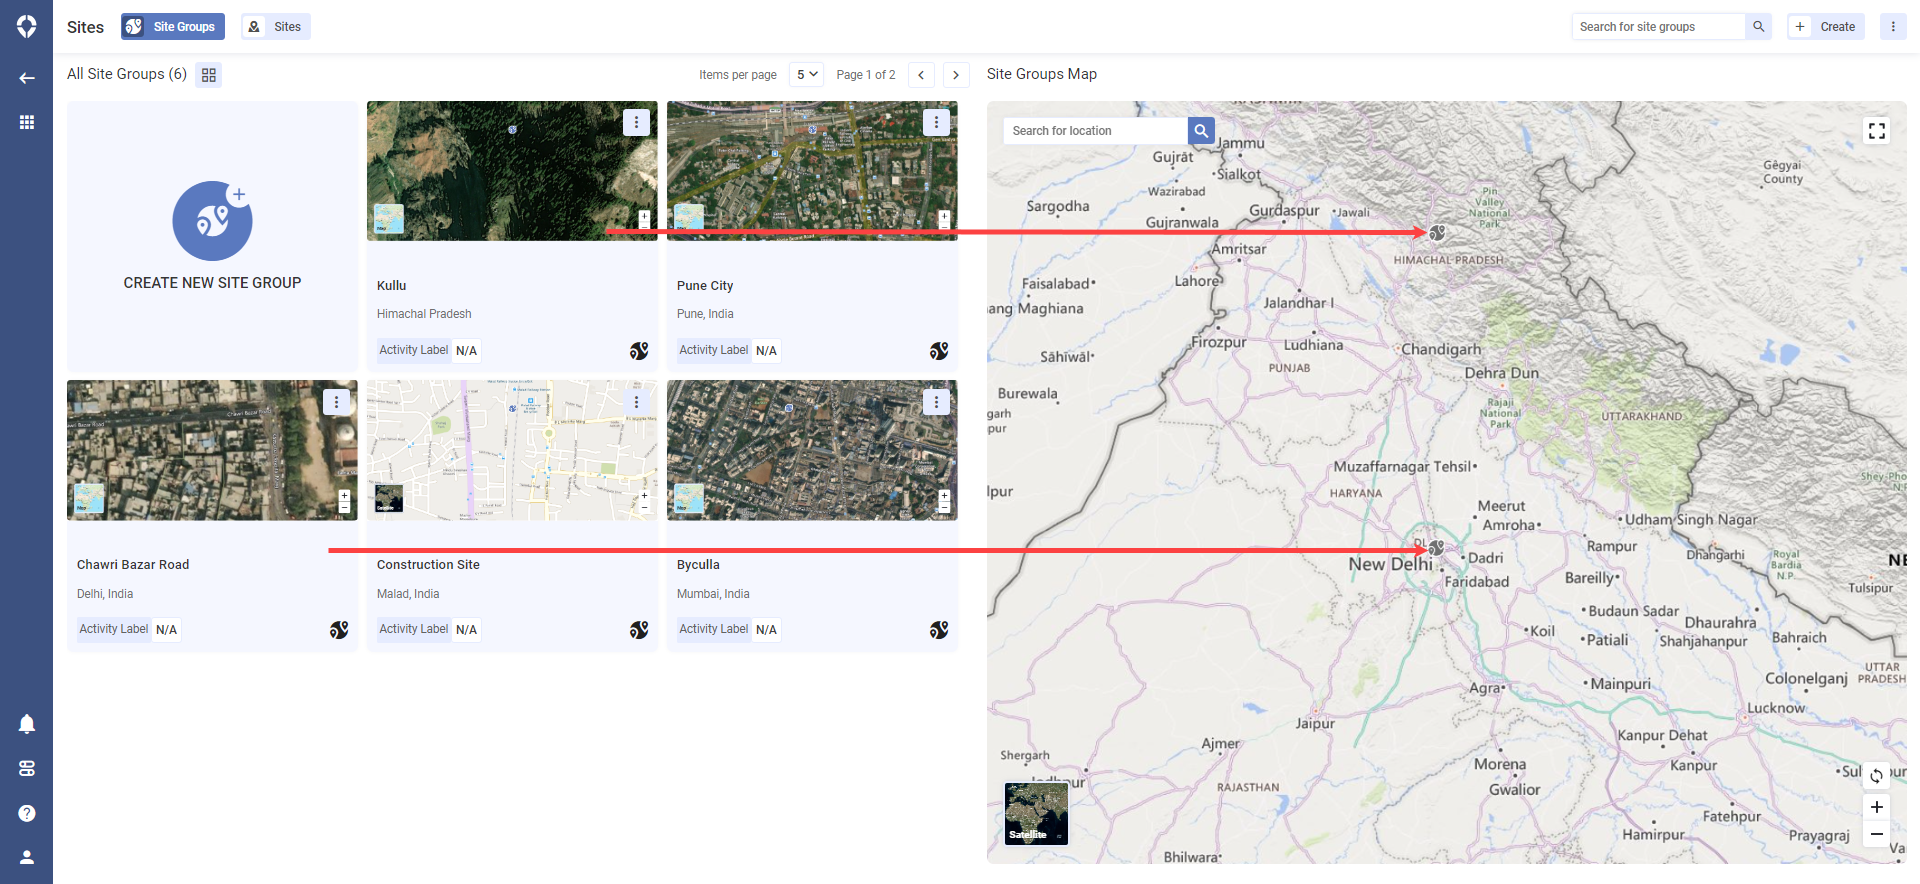
The Site Groups page displays the existing site groups on the left pane, and the right pane displays the location of these site groups on the map.

Site Groups Card view
The following options are available on the Site Groups page:
Options | Description |
|---|---|
All Site Groups | Lists all existing site groups as cards or list |
Switch Layout Icon | Allows you to view the site groups in a card or list format.
|
Create New Site Group | Allows you to create a site group. |
Items per page | Allows you to select the number of site groups to be displayed on a page. Use the arrows next to the page number to navigate between pages. |
Creating a Site Group
Navigate to the Site Group page in Sites module and click the CREATE NEW SITE GROUP option in the left pane. OR On the top right of the page, click Create and select the New Site Group option.
Input the following information:
Field | Description |
|---|---|
Site Group Name* | Enter a name for the site group.
|
Organization Name* | This is a read-only field that displays the name of your organization. |
Site Group Description | Add in details that help describe your site group |
Primary Site Group Location* | On the map view, Input the Site group location of the Site group. |
Click Save. The new site group is created and displayed under All Site Groups.
Modifying a Site Group
You can update the following details for an existing site group:
Site Group Name
Site Group Description
Primary Site Group Location
In the Sites module, under the Site Groups tab, click the three dot icon against the site group you want to modify and then click Edit. OR If you have opened the site group, in the top bar next to the site group name, click More Details, and then click Edit. The Edit Site Group page is displayed.
Update the required details and click Save.
Deleting a Site Group
In the Site Groups page, click the three dot icon against the site group you want to delete and then click Delete. OR If you have opened the site group, in the top bar next to the site group name, click More Details, and then click on the DELETE option.
In the pop-up that is displayed, in the input box, type DELETE SITE GROUP and click Delete Site Group. The Site Group is deleted. However, the sites linked to this site group are still available and can be found under the Sites tab.
You cannot delete a site group if there are any active milestones linked to the site group. You may either wait for the milestone(s) to be completed or remove these milestone(s) to delete this site group
Managing User Access for Site Groups
By default, only the Admin has access to all site groups created on Skydeck. A Site Manager or a Project Manager can create a site group and give access to other users who need to access this site group.
The level of access available to each user is decided by the role assigned to that user.
For more information on the roles and accesses, click here.
Navigate to the Site Group that you want to modify.
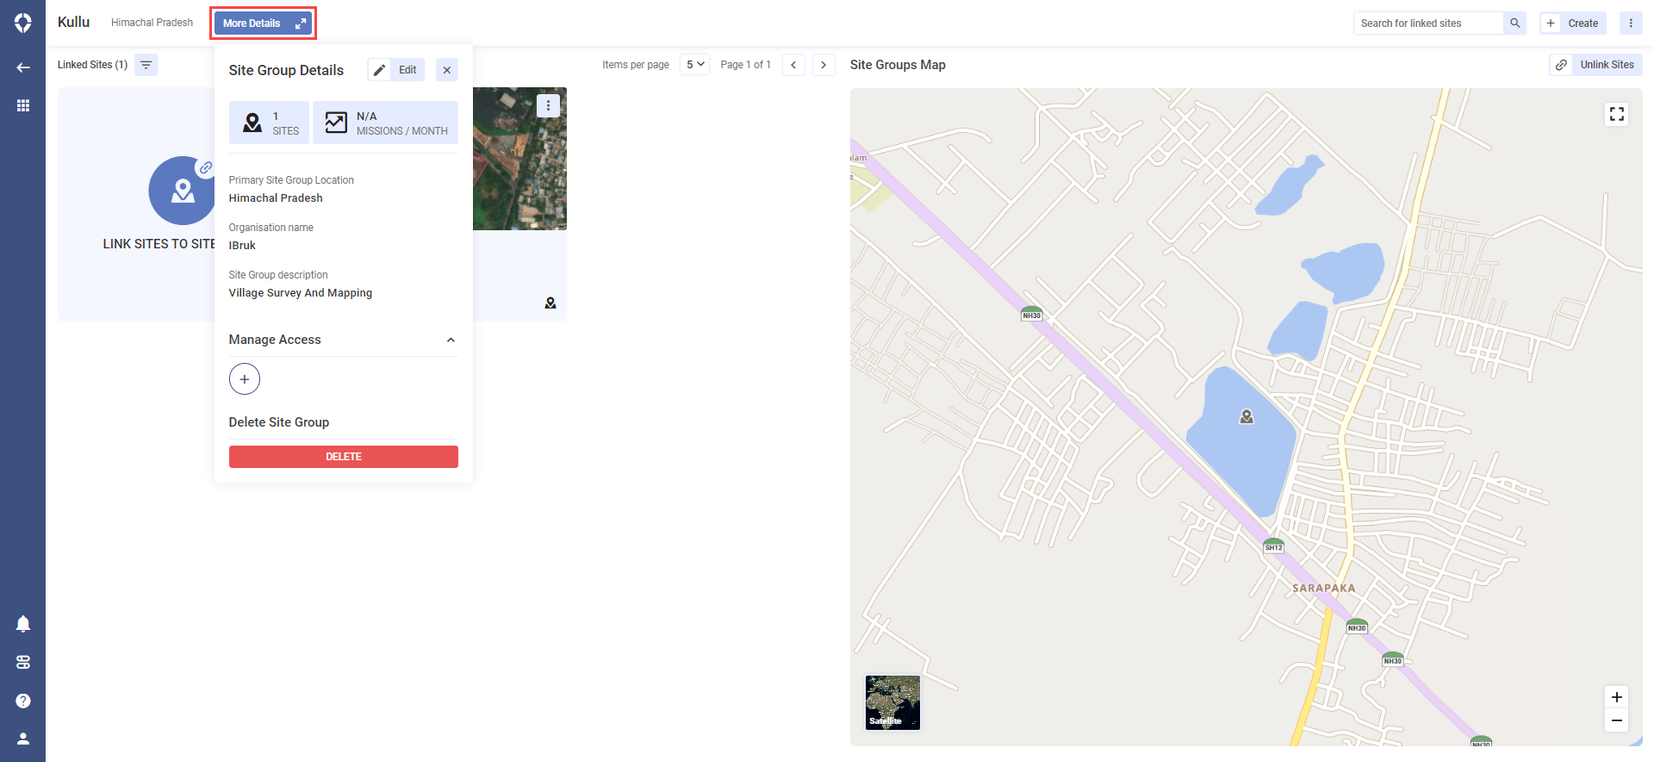
In the top bar next to the site group name, click More Details.

Site Group Details
In the pop-up that is displayed, go to Manage Access, click the add icon. The Manage Access dialogue box opens on the screen displaying the users who have access to the site group.
To remove access, click Remove next to the user’s name.
To give users access to this site group, in the search box under Invite users to Site Group, enter the name or email address of the user, and select the user from the displayed list. Repeat this process to add multiple users.
When you enter the name or email in the search box, users with any role, except pilot, will be displayed in the search results. The search result does not display users with admin role as they have access to all the modules by default.
Click Invite Users. The selected user(s) are given access to the site group and all the sites under it, and the access update notification(s) are displayed briefly on the top right. The site group is now displayed in the Sites module of these user(s).
Linking and Unlinking Sites
Creating a new Site within a Group
Open the Site group that you want to add sites under.
Click LINK SITES TO SITE GROUP and then click Create A New Site. The Create Site page is displayed.
Input the required information to create a new site. Click here for detailed steps for creating a new site.
The created site will be added to your Site group
Add an existing Site to a Group
In this section, we will learn how to select existing sites and link them to a site group from within the site group. There are two other ways of linking sites from within a site group:
Open the Site group that you want to add sites under.
On the displayed site group page, click LINK SITES TO SITE GROUP and then click Select Existing Sites. A list of all existing sites is displayed.
Select the site(s) that you want to link to the site group.
Click Link Selected Sites. The selected site(s) are linked to the site group.
Unlinking Site from a Site Group
In the Sites module, under the Site Groups tab:
In the Card view, click View on the card of the site group from which you want to unlink sites.
In the List view, click the name of the site group from which you want to unlink sites.
On the displayed site group page, click the three dot icon on the card of the site you want to unlink and then click Unlink Site from Site Group.
In the confirmation dialog box, click Unlink. The site is unlinked from the site group and can be found under the Sites tab.
